Sunday, August 8, 2010

Gifts from Beth, Fifi, Mary, Rosemary, and ‘A Lady’


This is an Ode to A Lady, correction, five Ladies.   
I've given my sincere thanks to dear new friends that presented me with tangible home decor 
gifts this past spring of dizzy joy, and now I’d like to share them with you, gentle reader.


The first gift is from Fifi O’Neill, and I hope all her dearest dreams come true for her as she made 
mine: a feature in her magazine Romantic Country .    A French grave-marker memorial heart 
of iron and enamel, rescued from further rotting in the ground of a forgotten Gallic grave. 
These relics are dismissed by the natives, but some of us foreigners find them lovely.


“ICI REPOSE AUSSINE Marie, decedee le 4 Avril 1931, a l’age de 86 ans, regrets eternel”.


The Edwardian Lady Marie Aussine and her welcome ‘French accent’ will live on 
in my tiny studio, no ‘regrets eternel’ here.   Going forward, every time I see this heart, 
I will be reminded of Fifi’s heart—her love of life, beauty, animals, and having 
the heart to handcraft her dreams into reality.


The second gift is Mary Randolph Carter’s  latest book For the Love of Old. 
I don’t have a picture of it as it’s still on its way to me because she was moved by my feature 
in the Times.    If its spine turns out to be a color that doesn’t harmonize with my décor's
 palette, I will employ the book cover Beth of Tattered Vintage  gave me.    She instinctively 
knows what I need – even though I bought a cadre of her designs for the first of two tapings 
for a show I'm going to be on (I signed documents prohibiting me from sharing that with you
at this time, but I will later), she included this in the email.    
It’s the one I chose to illustrate for the segment, and I hope it makes it in.


The third isn’t a present in the literal sense because I bought it, the present was the gift 
of time and trouble from Rosemary of Ozma of Odds.    I know the lip of my loft is 
unfinished and ugly, but I am wondering how to resolve it cheaply and practically, 
for I still need to draw the curtains and place ladders there. 

Five days before the taping of the show I keep hinting at, it came to my sluggish mind 
that a pair of her $9 each pretty rose petal garlands would do, only in white.  


 A pair of Ozma of Odds rose petal garlands along the edge of my loft's facade.


I received them from the other side of America not only in time, but with her usual 
thoughtful packaging.    Needless to say, I was in such a hurry I didn't take the time to 
photograph the package, but it was lovely as always.   
Doing business with artists is bliss. 


An anonymous artist I will call ‘A Lady’ sent me multiple packages of art supplies 
of great desirability and use.    Pretty jars hold the good sort of German glass glitter, 
vintage pearls, lace, and ribbon.    I opened the latter up so quickly I tossed aside the idea 
of posting about that part, for I desperately needed lace trim for a eurosquare pillow 


…and bows for Lady ZuZu! 


I’m not sure how I deserve such tender gestures, but I sure am very grateful 
I have such sweet followers.    My blushing thanks to every one of you, each 'A Lady'.

Until next time, stay shabby!


Sunday, August 1, 2010

Antique Roses on a Misty Summer Morn


Another quiet, misty summer morning on my steep hillside, with only the company of 
shy animals and HRH Königin von Dänemark and her court…


...similar 18th and 19th century antique roses 
Général Kléber (Moss), Celsiana (Damask), Félicité Parmentier (Alba),
New Dawn (Wichuriana Rambler, 1930 actually), and Blush Hip (Alba).


They all need their glasses filled with refreshing drink.


Graphic Art Backgrounds -
Tattered Vintage


Until next time, stay shabby!


I’ll be sharing this with:


Please come over and see all the pretty gardens!


Sunday, July 25, 2010

A Magical Dollhouse of My Shabby Streamside Studio by Cinderella Moments


About once a year or so, I see art or decor in print or on the web that 
completely galvanizes me with its beauty.    I’m excited to introduce you to 
Caroline Dupuis of Cinderella Moments , who contacted me with a link 


As a shy person, I’m quite embarrassed by all the ‘limelight’ my studio 
has shone on me – the very sweet comments from my gentle readers, 
magazine editors, a pair of big-time design gurus, and getting recognized 
at yard sales and stores, for example – but I’m learning to feel worthy of it.  
But, when I saw the pictures of my studio on her blog I gasped and cried out 
(at work, mind you, that’ll teach me to not goof off) like the first time I was 
contacted by some (Cindy of My Romantic Home) for my little studio. 


I immediately forwarded the link to my family and closest friends, 
and now I share it with you: a dollhouse so realistic I feel like I’m in my studio 
just staring at the pictures.   

This is art the only way it should be – labored, heartfelt, inspired.  
Caroline actually installed the woodwork board by board, just like I did 
for my studio, so I know something of what it took to make this. 

The best thing about her is she doesn’t stop looking for solutions 
when she’s stonewalled.

Caroline graciously granted me an in-depth interview, please see below.


Sandy  -  What touched me the most was the obvious work you did to get so many details right; the tissue roses, the sachet, all three chandeliers.   They bear your stamp of creativity rather than slavishly copying.   Can you comment further on that?
Caroline  -  The chandeliers!   I looked around for chandeliers to buy (this is what happens to me with everything!), but I couldn’t find anything like I wanted.    So I decided to try making one.   First, I looked up miniature chandelier tutorials online and found one to try.    I did it and didn’t like it.    So I went on my own!    Got inspired by looking at Horchow’s site.    I just start bending the metal and it takes me wherever it wants to go!    This is true of all my art work.    I listen to what the piece wants to be.    I don’t try to control it. 
Sandy  -  What ‘scale’ is this? 
Caroline  -  This is 1:12 scale. 
Sandy  -  What size doll would fit inside?
Caroline  -  I think 5 to 6 inch dolls.    I don’t even have one!  


Sandy  -  What materials are used on the exterior and roof?
Caroline  -  The roof is wood shingles, the regular ones you get for dollhouses.    The siding is a cardboard box that I cut open to get that ridged part.    I used the same material inside, but a smaller scale.    When it’s painted it looks like the real thing. 

Sandy  -  The ‘tin walls and ceiling’ are so sweet!    What are they made of?
Caroline  -  The tin is just cardboard and hot glue.    First, I cut out the little 2” square pieces of cardboard.    I drew a simple leaf and dot design and applied the hot glue.    This one gets me a lot of emails!    The secret is twirling so you cut those annoying hot glue strings.    Then I painted them white and lightly highlighted with silver.  
Sandy  -  Did you cut all the planks for the floors and ceiling out of wood?
Caroline  -  All the planks are craft sticks that I cut out one by one.    I always like when they split or break.    It looks so rustic! 
Sandy  -  How long have you been making dollhouses?
Caroline  -  I have only been making dollhouses since April 2010.    I had been making my paper (cardboard actually) cottage models for 13 years.    But my Etsy customers kept asking for houses to put their furniture in.    So I finally gave in.    I didn’t even think I would like it!  I don’t…I love it! 


Sandy  -  If someone wanted to get started in this art, how and what would you direct them to?
Caroline  -   Start with a kit.    A simple, little one.    I started with the Corona Primrose kit .    It’s still my favorite.    You want to do one with not too many pieces.    One you can see yourself finishing.    I use this kit all the time.    I just put more windows and doors to customize it.  
Sandy  -   I enjoy making decorative houses for Christmas, but mine look like the influential Coty Foster houses.    Do you make anything for the holidays?
Caroline  -   I love your houses.    I saw them on your Christmas post.    I’ve tried a couple of those myself!    I do have one Christmas dollhouse on Etsy.    It’s very whimsical.    Red with white polka dots, pink hand-painted interior, and even a Christmas tree I decorated.    It’s really in the Mary Engelbreit style.    I hope to do more as soon as I get hit by some inspiration! 
Sandy  -  Do you do custom work, for example, if someone wanted a dollhouse of their home, would you take it on?
Caroline   -   I don’t think I’m quite there yet.    I still think I need more woodwork practice.  Your little studio was my very first try at copying an existing structure.    It was sweet and small.    I never want to overwhelm myself with projects I’m not sure I can accomplish.   Also, I’m happiest when I work on houses that I fall in love with.    I did a lot of custom paper houses for people and I came to the conclusion that I’d rather do projects my heart tells me to do.    It makes the work so exciting and fun.    Like your studio.    I couldn’t wait to get up in the morning and start working on it!    That’s what art is all about! 

So true.
  
Visit Caroline at her blog Cinderella Moments, or her Etsy shop.

Until next time, stay shabby!


*    *    *

I’ll be sharing this with:


Come on over and see all the pretty entries!

Sunday, July 18, 2010

Storage Disguised As A Screen Porch


I wish I could thank every one of you in person.
It’s as if a tornado of miracles picked up my life and swept it aloft since the Times piece ran!
I try to meet every person that so sweetly blogged about me, and there are pages and pages
of more Google results after I thought I finished.   I try to reply to my comments,
and there just are not enough hours in the day.

It seems as if every weekend there’s a magazine shoot, or I’m collecting the
data my agent (yes, I have one!) wants for my first book, but Saturday was the ultimate.
The field crew for Nate Berkus’ new design show slated to premiere 13 September
interviewed me!    This lowly federal employee is pinching herself black & blue!

And you, my gentle readers, had a part in all of this…and will have one in the future.
I have plans that involve you.   Stay tuned…and stay shabby!

*     *    *

Someday, I will build a real screen porch behind my studio.
For now, I’m desperate for a place to stash my tools and wicker set.


Before


After

It’s just my old brass screen windows and doors I bought at Albany Salvage
last fall fastened together with screws on a laid-up stone foundation I built.
I think I’m going to paint them a darker green, like my front screen door.
I absolutely love white houses with dark green trim.


Each screen was $10.
The original homeowner had a clever way of numbering them.


The roof is just two scrap pieces of T-11 plywood painted dark green,
nailed on four 2 x 4s plus the header given to us by a neighbor with leftovers.


The chippy columns are my favorite part.
I will never paint them.
They were $60 each at New York Salvage in Oneonta.
One often sees screen porches in the Catskills like this.


Now, my little pink tools have a nice home until the day I take it apart for my addition!


Until next time, stay shabby!


I’ll be sharing this with:

Please visit Cindy's great blog!

Monday, July 12, 2010

My Chippy White Window Box


Back in April, I spent a weekend creating a window box for my front porch.


Window before


I ran out of spare rough-hewn boards for the façade of my studio last fall,
and now that the weather’s mild I tackled this.
Just a piece of old plywood sufficed.


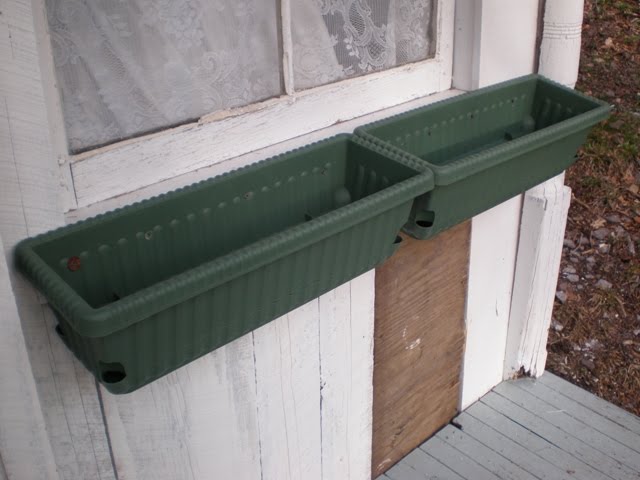
Then, I screwed the $8 window boxes I bought at the
Price Chopper grocery store on to get an idea where to build the ‘holder’.


It really helps to have a drill bit to pre-drill holes for screws.
The wood doesn’t split as easily and it hastens the fastening of the screws.
It’s easier to back them out as opposed to pulling nails if you make a mistake, too.
I make a lot of mistakes, so I’m always at Dubben’s Hardware in Delhi
getting half pounds of screws measured out on their antique scale.

I’m very lucky to have a lot of scrap wood left over from other projects.
My appliqués are handy, as is my rose-pattered china bowl of odd screws and tools.


The sides are cut with a circular saw, and go up courtesy of my pneumatic nailer
with 18 gauge nails, ($75 plus the $200 for the air compressor,
bought nearly 10 years ago when we began the huge renovation on our first house
saving us THOUSANDS in contractor bills).
It's there in the corner of the picture with its long orange hose.


Then, the trim and appliqués go on (with wood glue and a few pneumatic nails)
and the plastic window box inserts go in.

This is my favorite part of any project:
the moment it actually looks like something you had in mind!


Sunday morning, I am encouraged by Saturday’s progress,
and I hope to put that step to the door up at long last, too.
My little Maltese dogs can’t have ingress and egress without my assistance, you see.


Set up to paint with my pneumatic paint sprayer ($40) that attaches to my air compressor.
Actually, the sprayer cost $20 at Tractor Supply’s big Memorial Day sale last year,
and I thought I was getting a huge deal because they’re normally $40.
And then I learned I had to buy extra fittings at Auto Parts Plus to make it work,
so it was 40 bucks anyway.


And, your paint has to be thinned to use a sprayer, so you save on paint.
It’s great for chippy things because the chips don’t come off the
way they do when you use a paint brush or roller.
The set up and clean up is the longest part: the spraying took maybe a minute or two.


I set in my Bobo Pink myosotis – pink Forget-Me-Nots,
bought at my favorite farmstand Hanover’s of Mount Tremper, NY on Rt. 28.
April is way too cold to plant these fresh-from-the-greenhouse beauties.
I kept these indoors at night.

The wreath appliqué is $5.25 from The Bella Cottage,
and the swags are $10.95 each from Do-It-Yourself-Chic.


When mid-May arrived I finally planted some lilac-white petunias
(two hanging baskets I split in half, then planted in each window box)
and this new annual that looks like self-seeded white alyssum!

The bluets (Houstonia) are kept in their container so that I can plant them
 in the grass after they finish blooming.   I wish I had the money for a whole flat of them,
but they were $4 each. I grabbed some other goodies, like a lilac flowered,
variegated leaf pulmonaria (Jacob’s Ladder), and some stachys byzantina (Lamb’s Ears).
I at least can say I pumped a lot of money into the local economy.

I have no self control when it comes to plants!


I had enough time left to fashion a step out of scrap wood.


The tread is three pieces of a park bench we found
stuck in the muck of our stream bank when we bought our property.
My King suggested I make the front panel into a hinged door so I have storage.
Great idea.


Until next time, stay shabby!


I will be sharing this with:


Please come and see all the pretty entries!